Graham Maggs
Austin Healey
Sebring sprite
#sebringsprite #austinhealeysebringsprite
#classicsebringsprite #silverstoneclassic
#shelsleywalsh #shelsleywalshhillclimb
#goodwood #goodwoodrevival
#instagram #classiccars #classiccarproject
#americaclassiccars #chevypickup
#chevroletpickup #chevystepside
#Dtypereplica #triumphclassiccars #mgclassiccars
#dtypejaguarreplica
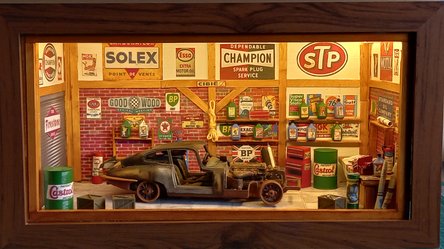
#lotusclassiccars #dioramas #diecastdioramas
#brooklands #brooklandsmueum #rafmuseum
#bespoke #hobbies #bentley #porscheclassic
#harleydavison #lotusclassic #ferrariclassic
D type replica kit car
My latest re-creation
Started May 2018
#dtypereplica #silverstoneclassic #shelsleywalshhillclimb #prescotthillclimb #classiccars #coffeeandchrome #classiccarproject #kitcarproject
The Standard
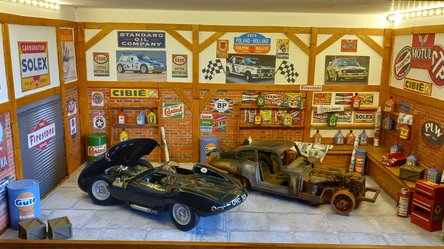
The Lyndon
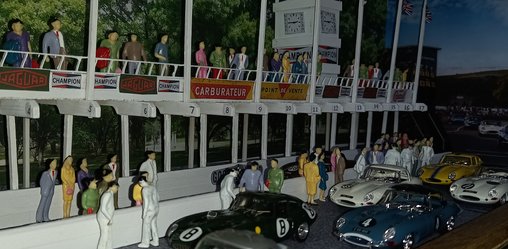
The Goodwood
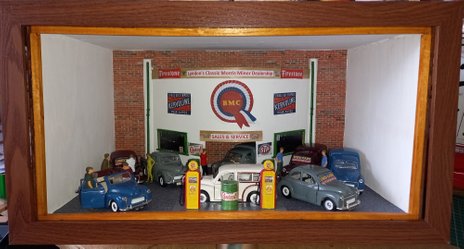
The Lyndon
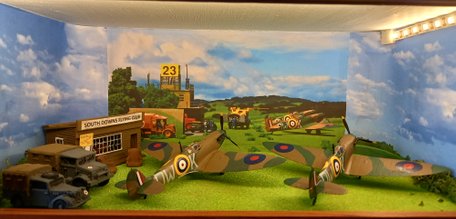
September 1940, The Battle of Britain
Spitfires at the ready!
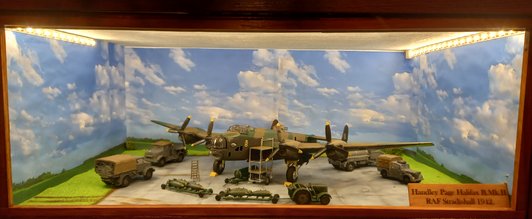
Handley Page Halifax loading up
RAF Stradishall 1942
Episode one
The purchase
May 2018
OOOOOOOOOOOOOO
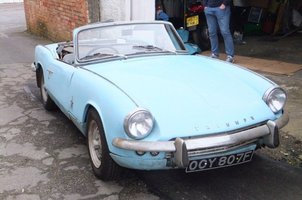
<<< From tired
Triumph Spitfire
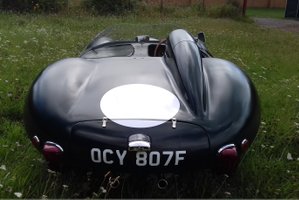
To D-type tribute
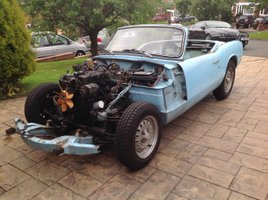
1968 mk3 Triumph Spitfire
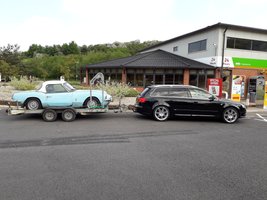
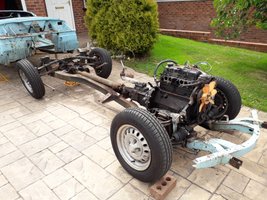
Trip home from Barry, South Wales, Mid May 2018.
Full inspection of chassis did not reveal any horrors with the engine and gear box removed.
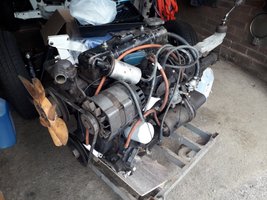
Engine can now be very easily checked over, head and sump off with all gaskets replaced.

Interior being stripped, parts, fixings etc are all bagged and labelled.
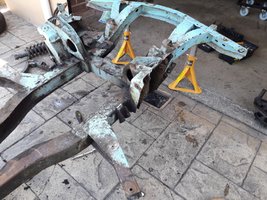
Carry out final repairs prior to taking chassis to be stripped and marine grade powder coated.

Chassis undergoing one of its stages prior to powder coating and baking etc.
Car seems to be coming apart quite easily, looks to have had work done some time ago.
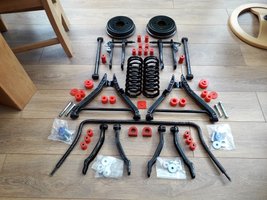
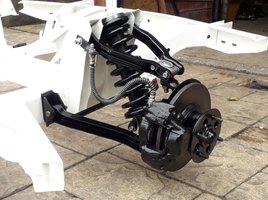
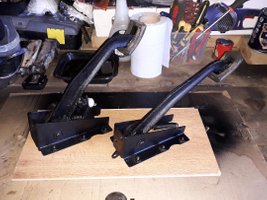
So while the chassis is away, I can get on and hand work the front and rear suspension parts.
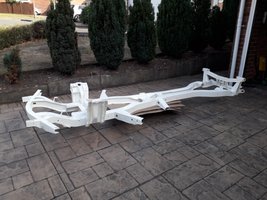
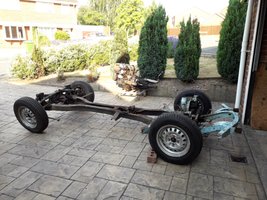
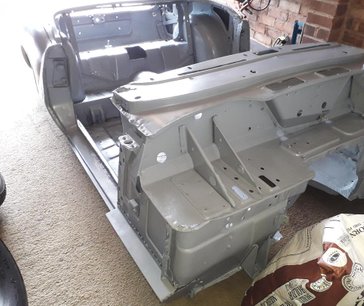
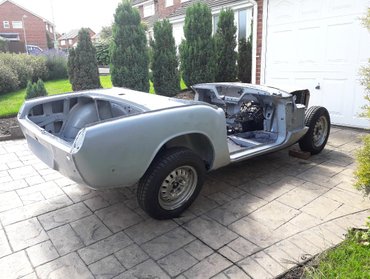
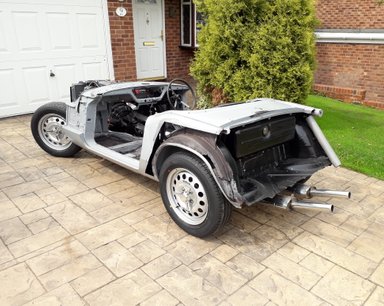
Mid August, and a good day today, collected the chassis from the powder coaters. exciting times.
With a little help, the tub could be easily liffted from the chassis on to stands.

Almost all of the original parts have been reused where possible.
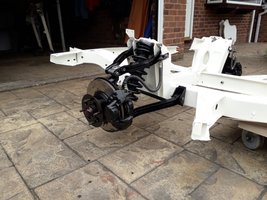
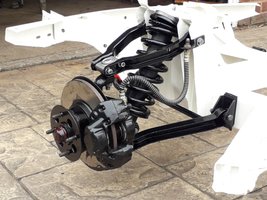
Front suspension and component assemblies completed.
Above, and we are now into September 2018, its a very satisfying period of any restoration, where almost all of the dirty work has been done and clean parts fit together easily.
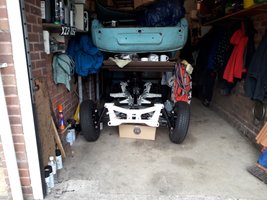
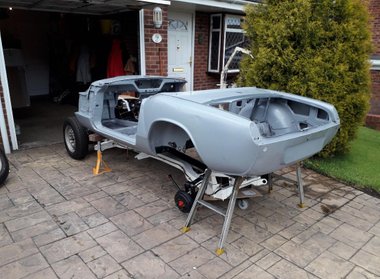
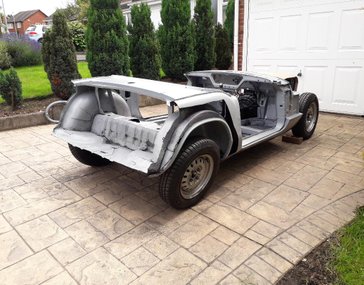
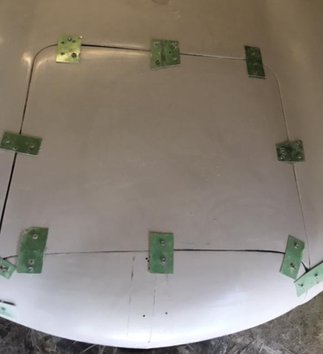
Built a strong scaffold frame to load the body tub upon to so I can wheel the chassis in and out of the garage to work on the drive.
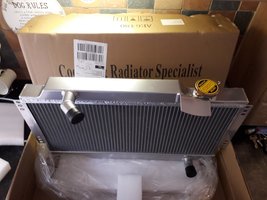
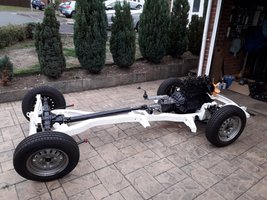
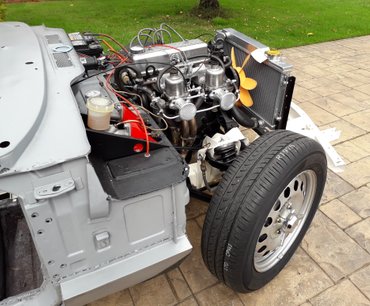
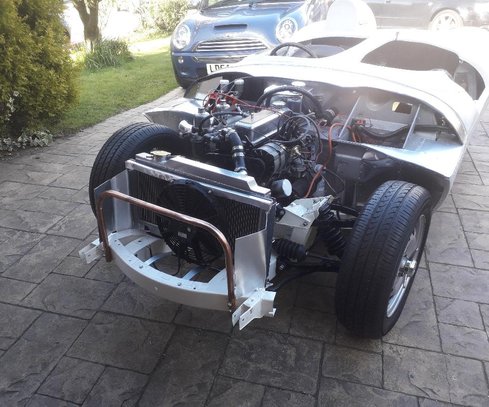
As always, thought better of trying to save the original rad, located and bought brand new larger rad as replacement.
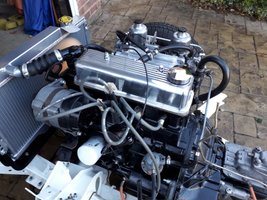
New radiator fitted along with hoses etc, found TDC, did a rough tune and fired up the engine, nice to have it running again.

Fitted the twin SU's with a couple of Ram pipes, look nice but may well run with a couple of pancakes yet?
NB. at this point I should just mention that, further down the build,
I have replaced the twin SUs with a new Weber 45 DCOE.
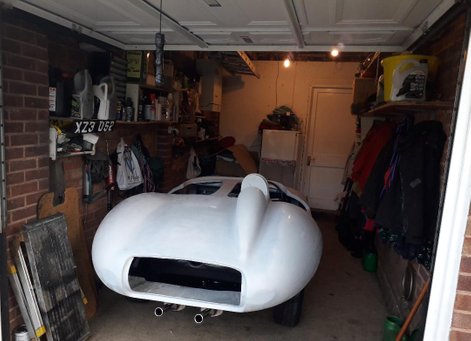
Okay, September, October, now into November 2018, and I have moved work into my workshop in the back garden, heating, lighting and a sound system make it easier to work on the smaller parts than on the drive on these darker winter days.
Spring 2019, the next large stage, will be to remove the body tub from the scaffold frame, remove all the surface rust, repair and weld where required, cut down the tub and place back onto the chassis, enabling the car to be driven in and out of the garage, where in the future, I can think about attaching the new bodyshell.
Above, small items, paint and over40 odd years of gunk and rust stripped, treated, painted and re-assembled in my workshop, parts placed into a box and shelved until needed for reassembly in the not too distant future.
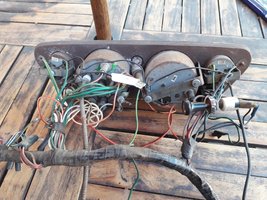

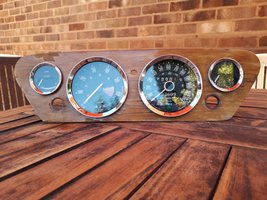
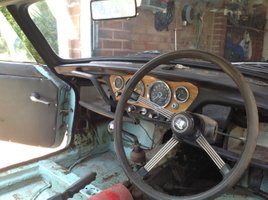
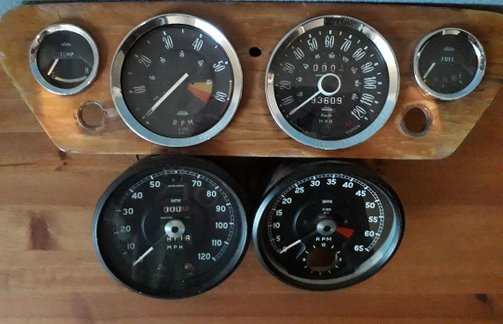
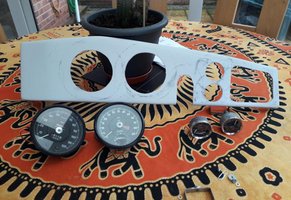
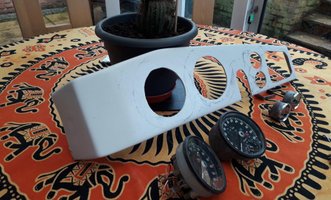
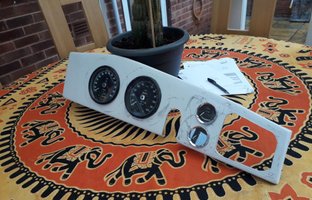
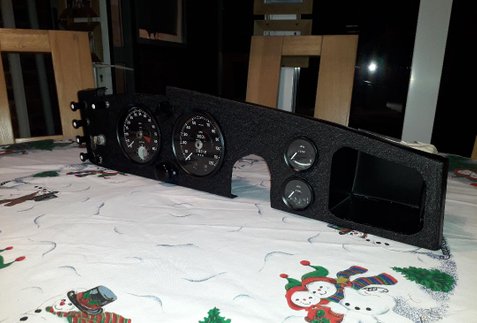
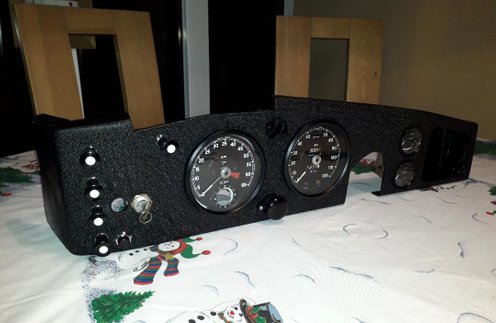
With the dashboard removed, the instruments could be examined, cleaned and re-assembled, although I shall only be using the fuel and temp gauges, I have managed to source and buy a nice set of mk2 Jaguar gauges as below, these should look nice in the special, and should go with the custom built dashboard and other gauges etc,
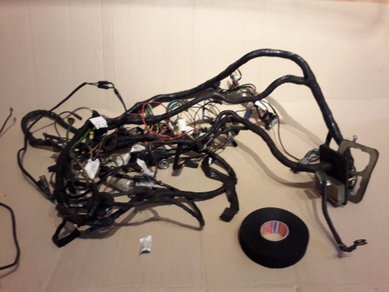
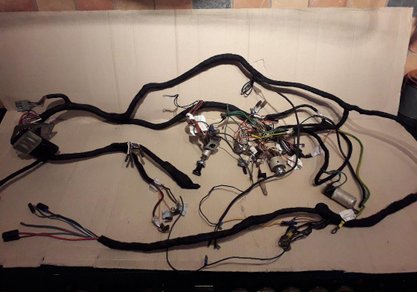
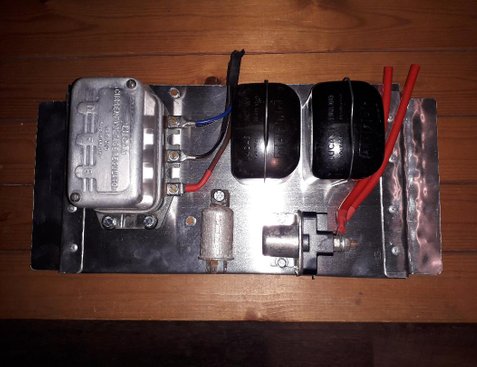
Above, the wiring loom was cleaned and inspected, loom has now been stripped and recovered with a roll of loom fabric tape.
Above
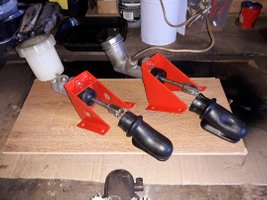
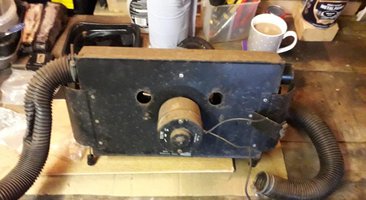
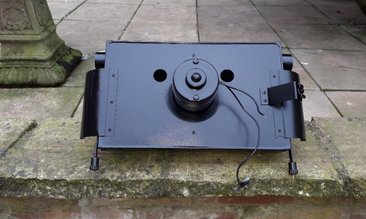
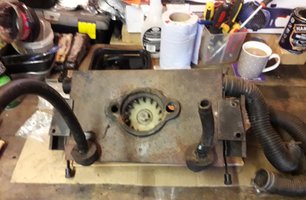
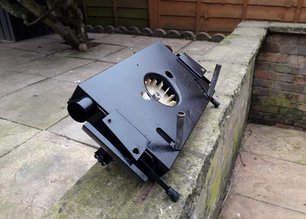
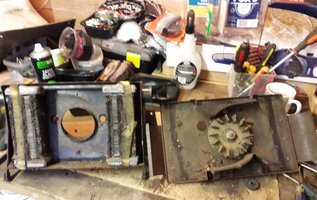
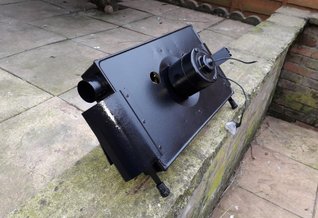
Heater unit, motor and matrix removed and checked for leaks etc. All components cleaned and treated with rust remover before undercoating with primer prior to painting and reassembly. Motor unit taken apart, cleaned and moving parts lubricated before putting back together. Motor now runs at smoothly at speed.

Above
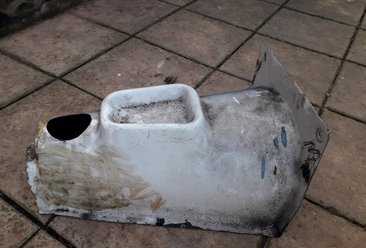
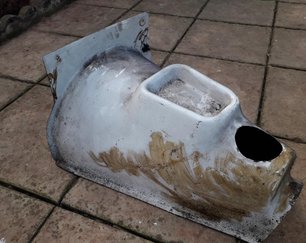
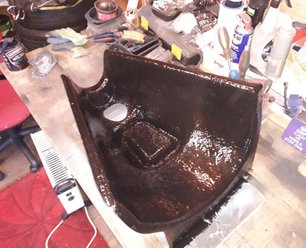
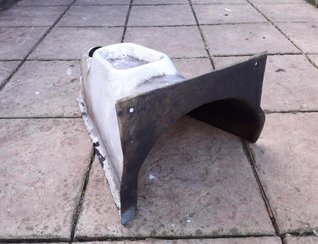
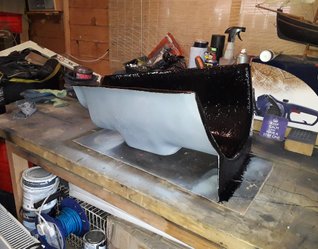
Gear box tunnel (fibre glass) was scrubbed clean and smoothed, primer and a couple of coats of paint applied to bring it back into good shape.
Above
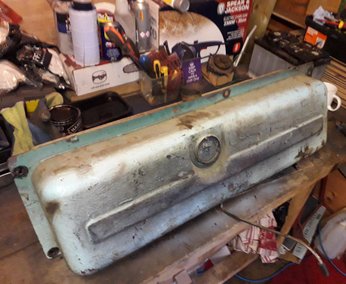
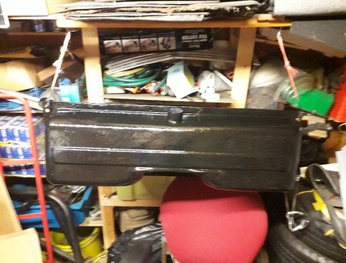
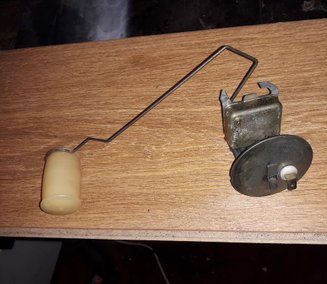
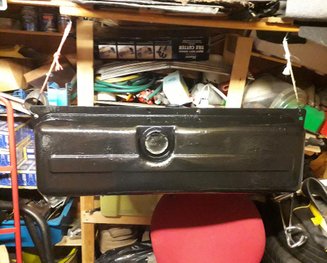
Original fuel tank flushed with tank cleaner and a hand full of nuts and bolts to remove the surface rust within. All paint and surface rust removed from the outside before being treated with my usual brand of rust eater. Fuel tank has then been coated and hung to dry before it's final coat of satin black paint. Fuel sensor cleaned and bench tested, seemed a waste to chuck when working.
Below
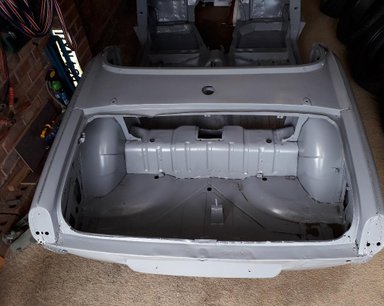
Mid March 2019 - I have now removed the body tub from the scaffolding tower in my garage, I can now make ready to send off the body tub to be stripped and undercoated, on its return I can get on with the sill repairs and some minor welding issues etc, before cutting down the rear arches, painting and getting ready to place tub back on to the chassis.

Above
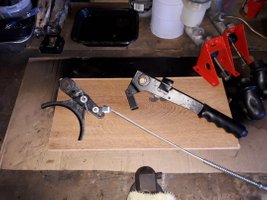
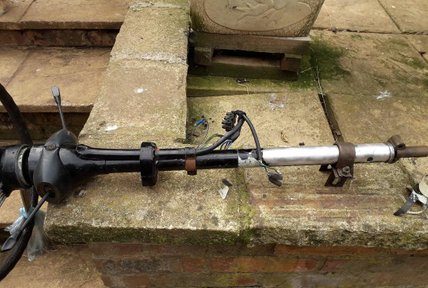
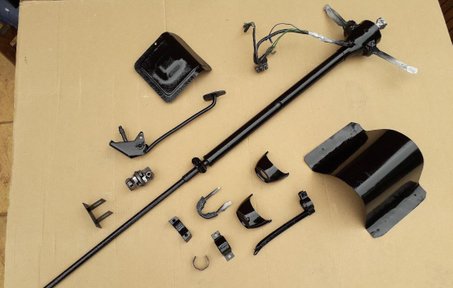
From the rear access plate cover, through to part of the gear box cover plate, accelerator pedal and steering wheel shaft, parts all removed of grease and grime, treated and then a new coat of paint to finish.
Below
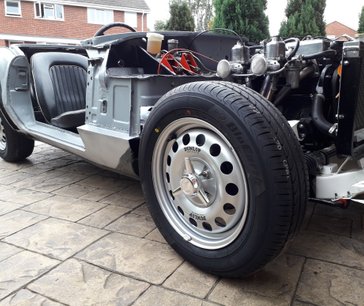
Set of 15" steel wheels sourced from ebay new old stock. looking not to unlike a set of dunlop knock offs, these were a fraction of the price. New tyres all round and some cusomizing of the centre hubs give that great jaguar look to the wheels. Tyres are 185/65 R15.

Below
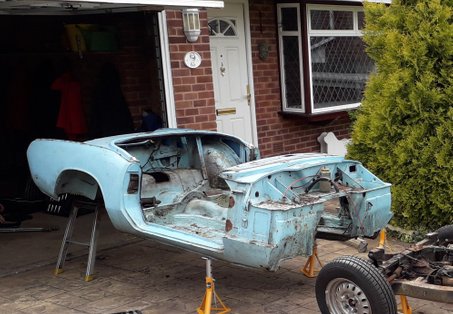
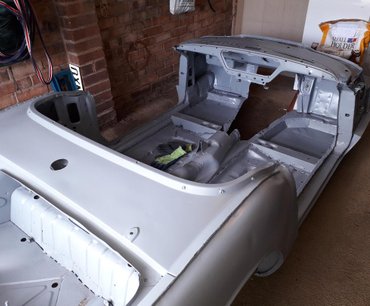
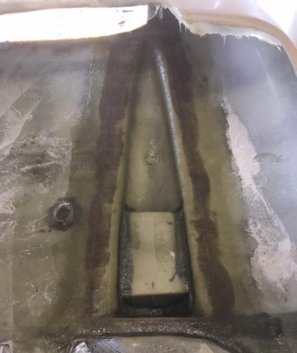
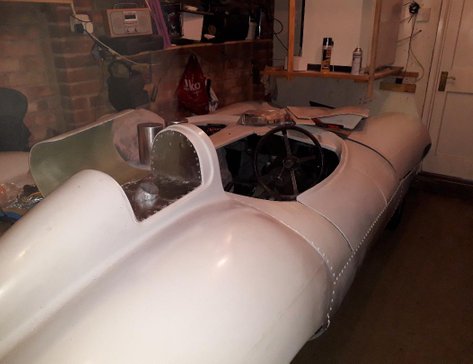
Seems to have been away for an age (all of April and part of May) anyway, Tub has been returned from the workshop having been away for media blasting, the tub has also been treated and given a good coat of primer, I can now get on and repair the sections and panels where time and elements have taken theier toll. Having a good look at the tub, it appears to be in pretty good shape, there are several places mainly to the floor pan, boot and scuttle where there has been quite extensive repairs already carried out.
Above
(the longest day) 21st June 2019
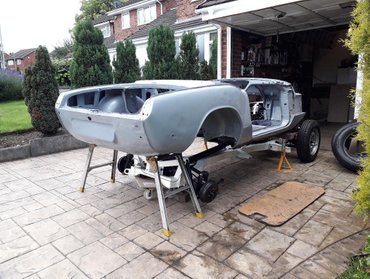
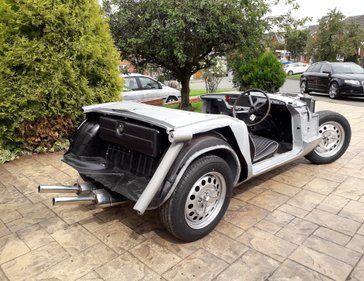
At last the rain has taken a well earned rest and the sun is shining again, decided to use this break in the weather to place the tub back onto the chassis and cut the rear section as per the instructions. A little tricky at times measuring and marking, definitely a two person job, but slowly slowly as the saying goes, could have done with that monkey even if just to hold the tape measure for me.
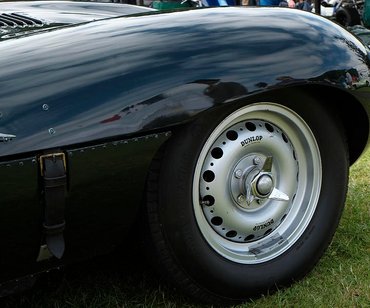
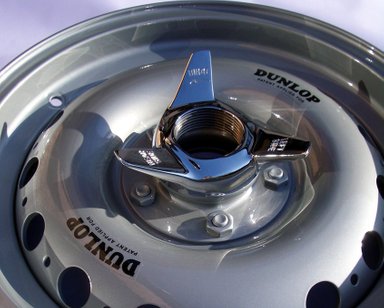
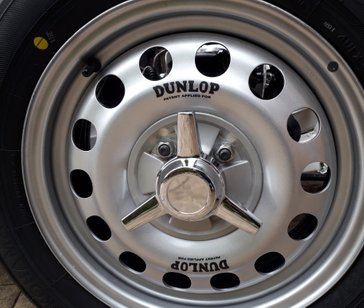
Above. original dunlop style wheels as fitted to D type. Above photo. As new, replacement Steel wheel £395 each My wheels sorced on ebay, new old stock £50
Above
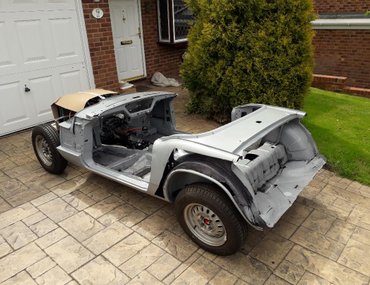
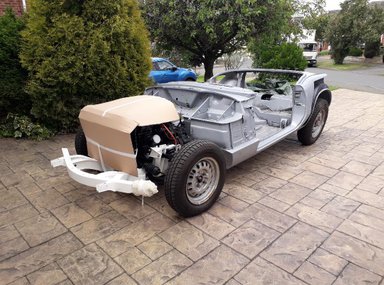
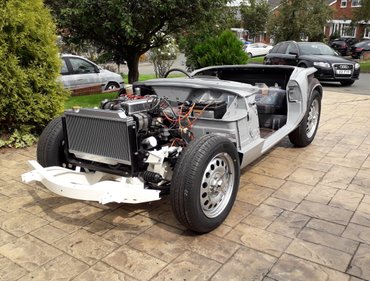
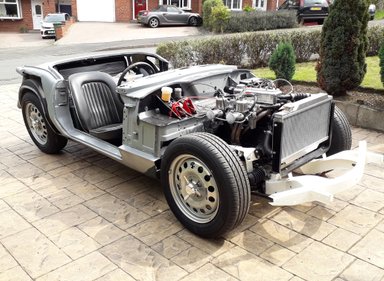
With the new wheels now fitted to the original spitfire hubs with adaptors, more of a trial fit so as to cut wheel arches to size to the rear and remove metal from the front bulkhead to prevent tyre rub when turning. Jaguar style grp body shell now ordered as of July 8th, and should be ready for delivery around mid August. Also now fitted electronic ignition, certainly makes a difference!
OLD NO.7 body kits. A352 kit.
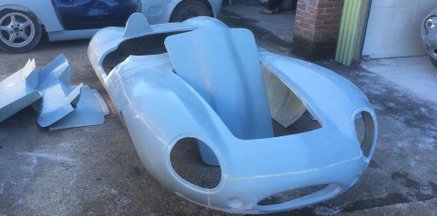
Above is the fibreglass body kit I plan to eventually use for my Spitfire project, this will then form the basis for my replica, as you can see, the kit is quite heavily based on the Jaguar, the kit shown above is a one peice shell, there is an option to have the complete seperate flip type bonnet.
The kit above is the A352 and is supplied by Old no.7 Kits.
The A352 ia a body conversion kit based on the triumph spitfire. As the kit uses a cut down spitfire bodytub and an unmodified chassis and drive train it is free from IVA test and keeps the spitfire's original registration and tax free status.
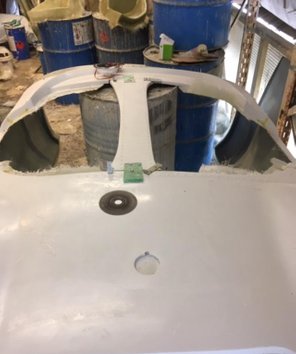
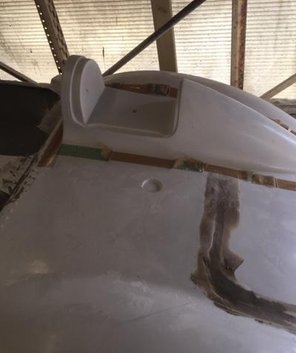
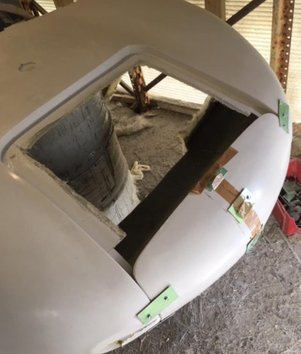
Above
photos showing the preperation for moulding the complete body shell.
August 2019
Below
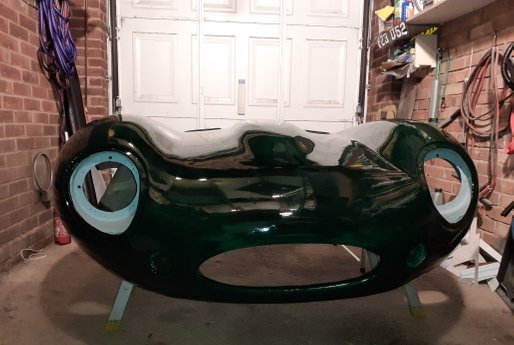
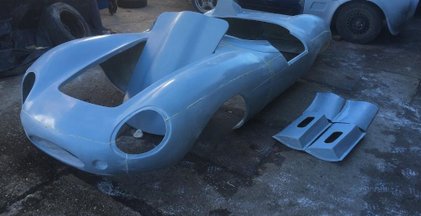
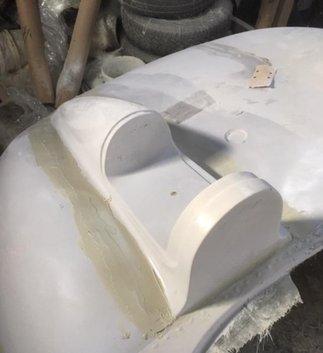
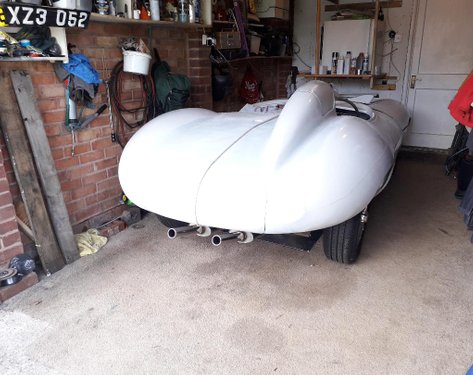
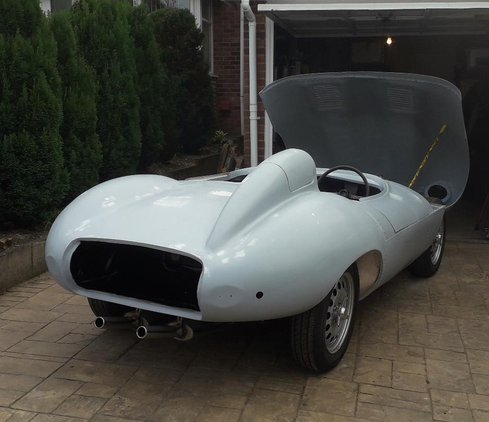
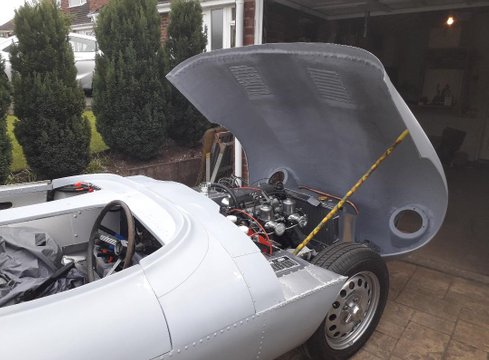
Body shell removed from the mould and ready for the modifications required for d-type as required.
Above
Bonnet being prepped for centre section piece to be bonded in so as to be one piece. Grills being marked up for fitting
Above
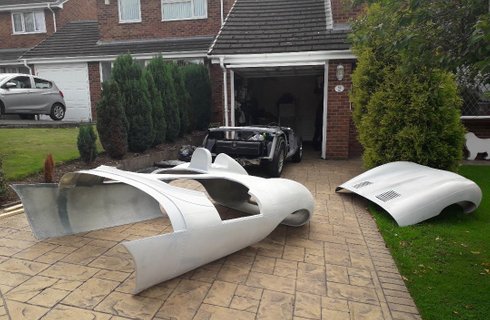
The arrival of the kit, bodyshell will have to be placed on and off the tub a great many times in order to get the correct fit and alignment. This really is a two person job, and care must be taken not to damage the kit during this process.
Above as of Sunday 8th December
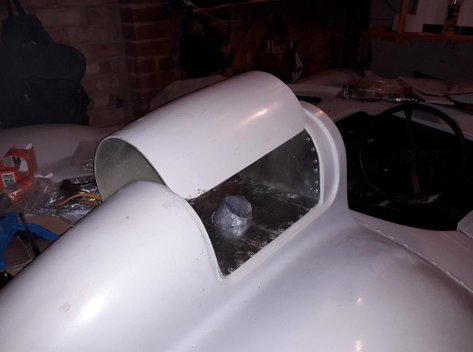
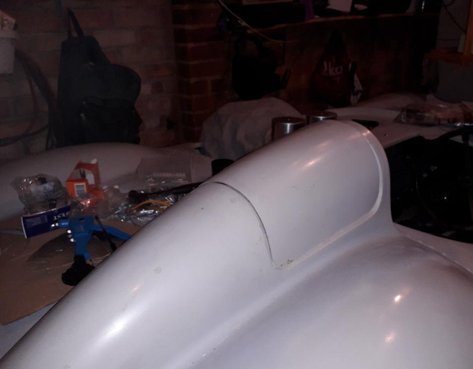
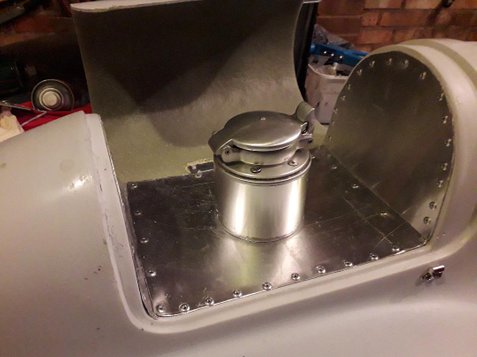
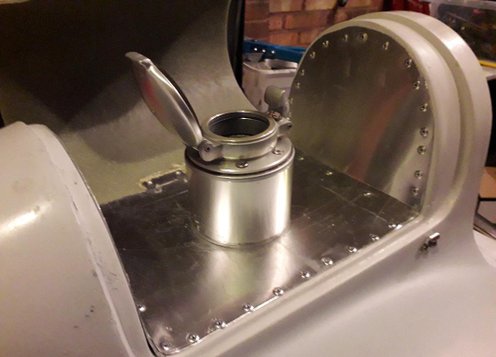
Using various bits & pieces from my collection, I have come up with this version of neck for the (new) old stock 1977 Aston Martin flip top filler cap. Now waiting for some better weather so I can re-start on the bodywork, especially lining up the bonnet to the main tub.
Above
Dummy electrics, to be mounted on to the Passenger side dashboard, fuse boxes and relays etc.
Above
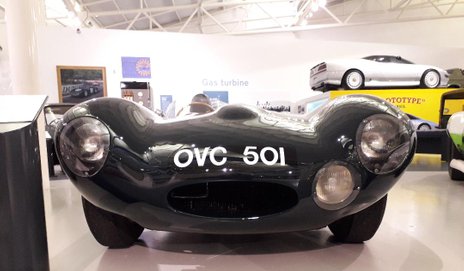
A trip over to the National Motor Museum at Gaydon for some insperation. One of the many cars on show was the 1954 D-type Jaguar OVC 501, this car was the prototype test bed chassis, driven by Norman Dewis prior to the prestigious sports car race, the Le-Mans 24hr
Above
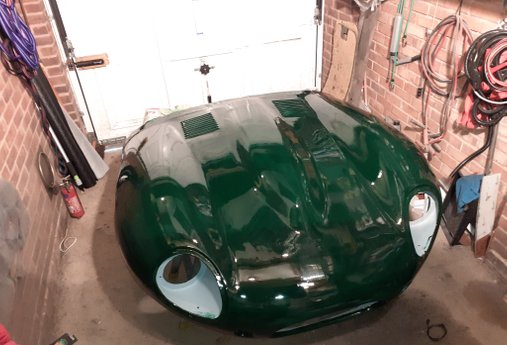
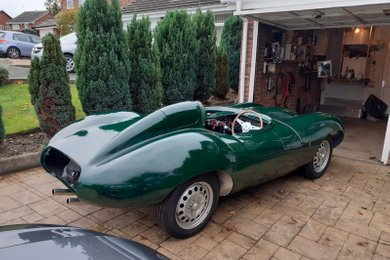
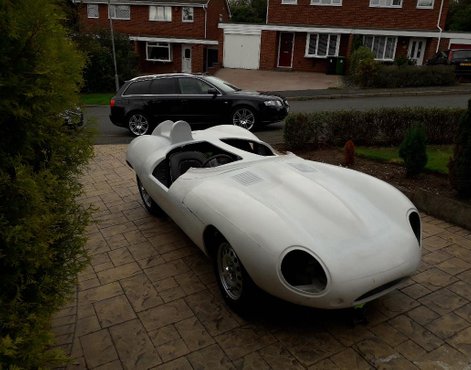
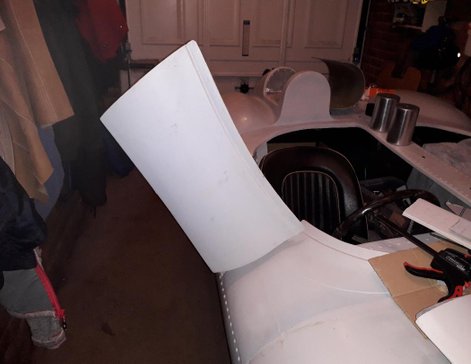
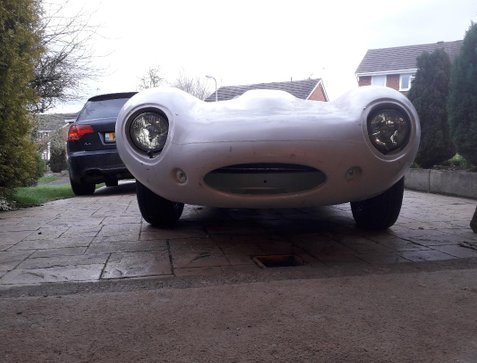
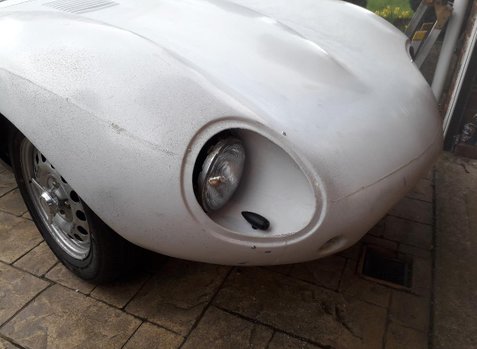
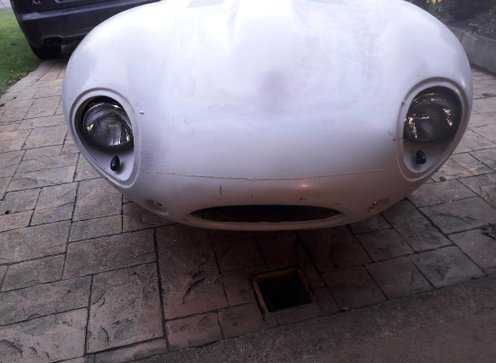
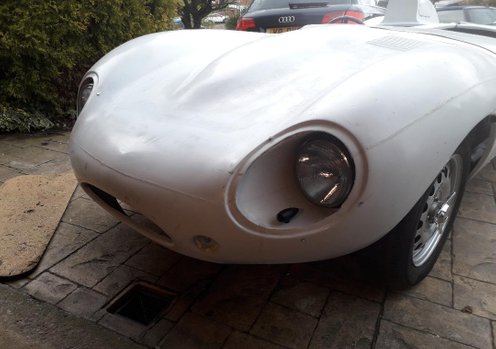
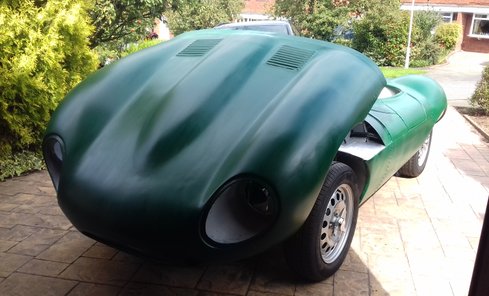
March 8th 2020. Plenty of work has been carried out up to this point. Headlight cowlings fitted. Front headlight and indicators positioned for trial fit.
ABOVE
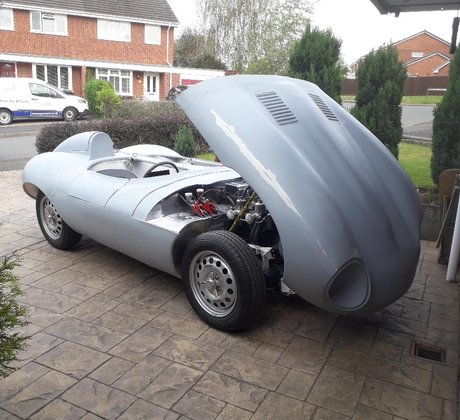
To accomodate the non standard larger radiator, I have lengthened the bonnet by 100mm or 4", this has meant having to alter the wheel arches, then using filler to reshape the arches for the correct fit. I have then gone over the bonnet with a variable speed orbital sander to rough up the gel coat so as to apply a couple of coats of etch primer, this will then be flattend off again and a couple more coats applied.
Above
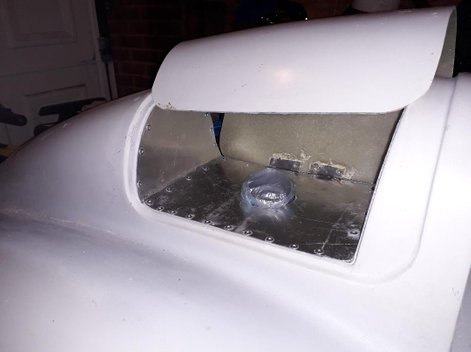
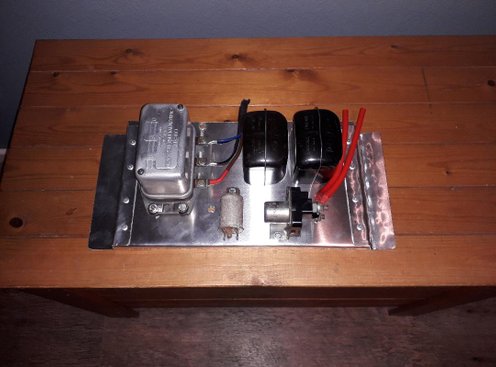
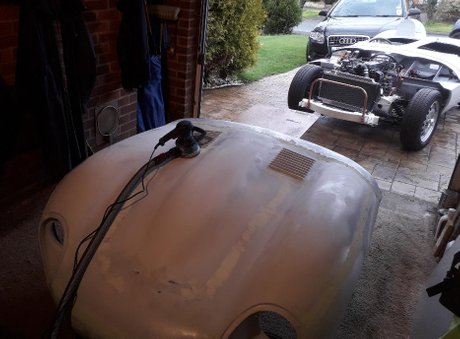
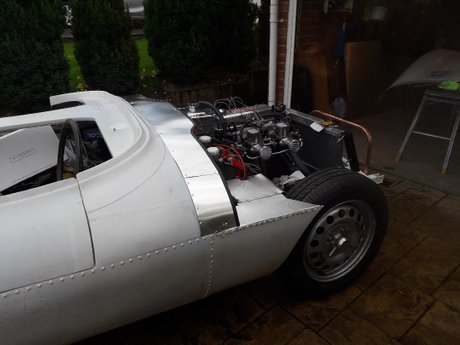
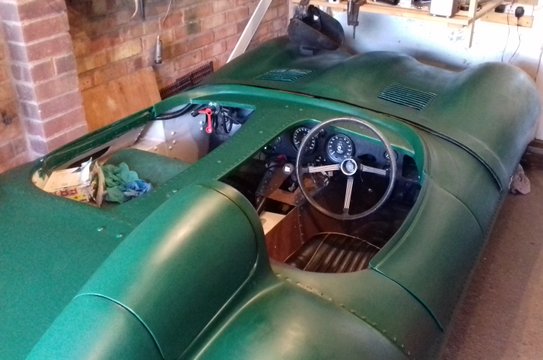
Last year, I sourced and bought locally, two sheets of 8' x 4' aluminium, this is being used for the cockpit interior and engine bay.
So while the bonnet is drying, I can measure, cut the sheet and carry on detailing the engine bay.
Above
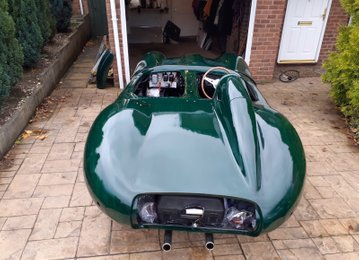
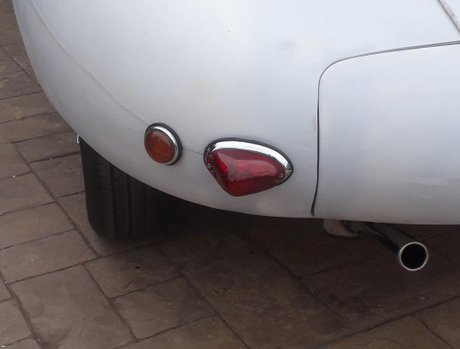
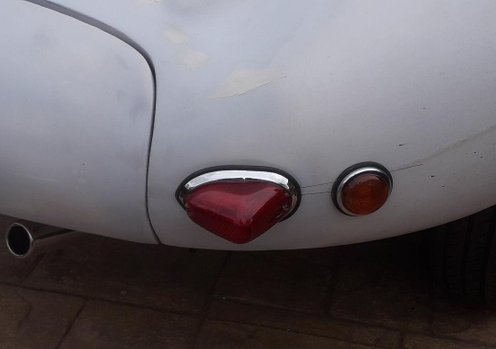
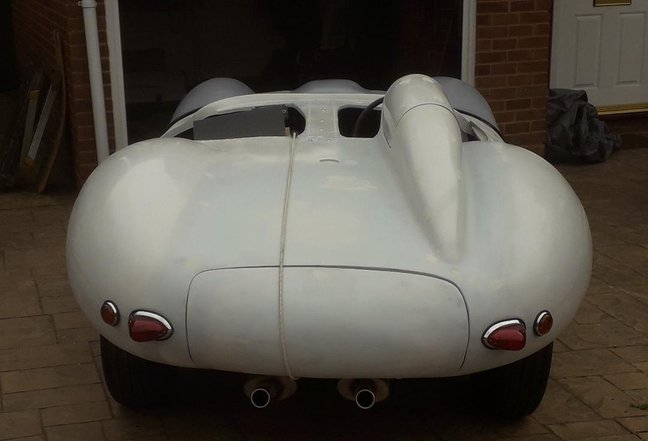
Mark, tap and drill, trial fit postion for the indicators and tail lights.
Above
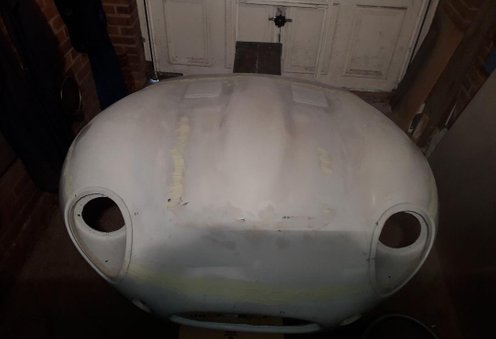
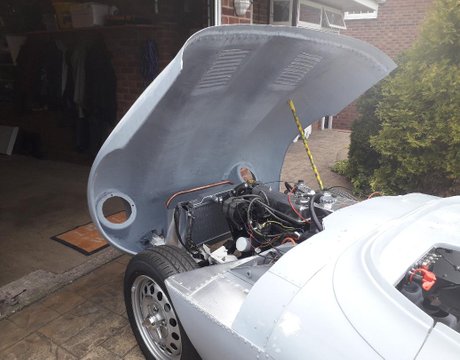
12 March, Staying home! at least I have been able to carry on working on the car over this Easter weekend. I have brushed on another coat of etch primer, then flattened off with an orbital sander and smooth filled any defects on the body. Cleaned off the underside of the bonnet and again using the etch primer, given it a couple of coats. Also routed the original wiring loom through out the length of the car, ready for connecting up. To anyone looking in. Please stay safe in this most difficult of periods!
Above
Taking one of the seats, in this case, a passenger seat (which for some reason the car was fitted with 2 passenger seats) removing the circa 1968 seat covers and padding. The seat back upright then needed to be slimmed down in order to fit between the now narrower cockpit. This meant making a vertical cut from base to top of back rest, therefore narrowing the backrest by around 60mm, the seat base has now been rubbed down and given a coat of primer.

Above
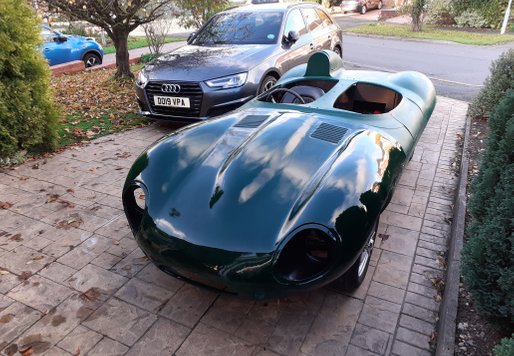
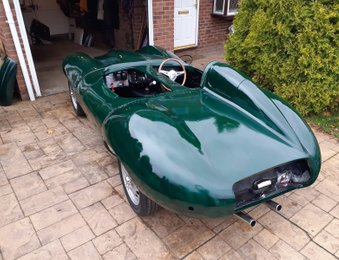
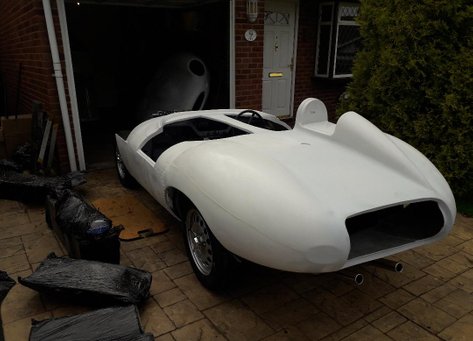
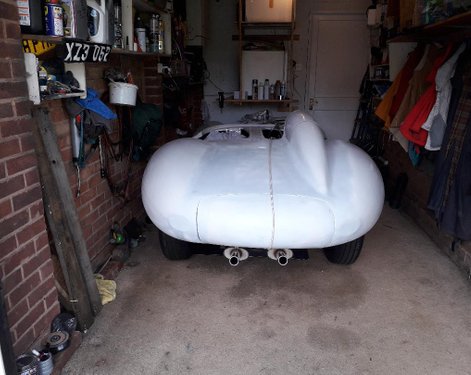
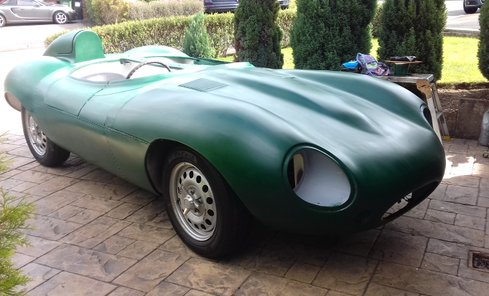
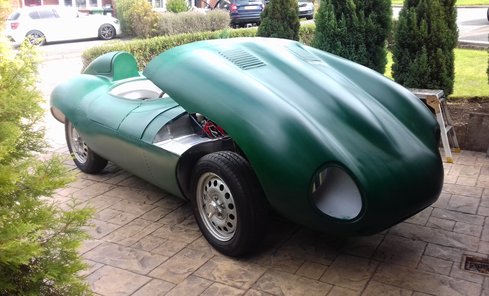
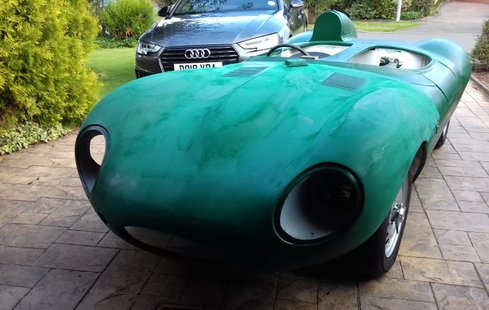
As of Saturday, 5th September. The body has now been given two coats of 'moss green' undercoat. Body will then be rubbed down and given a further undercoat before final prep and top coat of BRG.
Below
The Cat has now had another good rub down, washed, degreased and given another coat of undercoat, before being parked up for the night.
Above
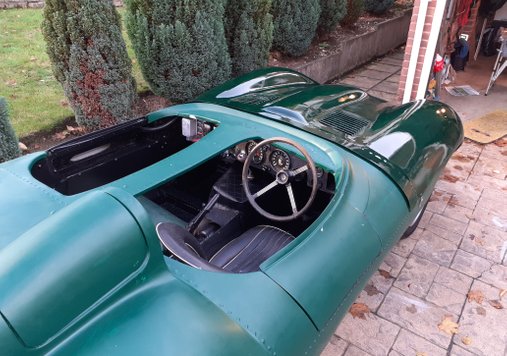
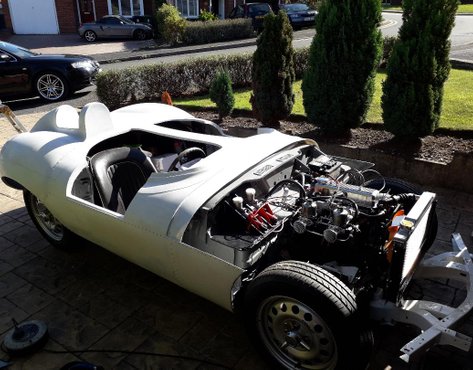
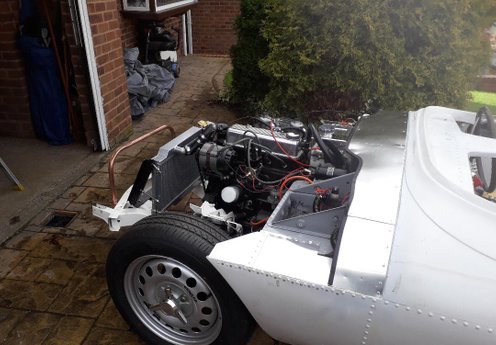
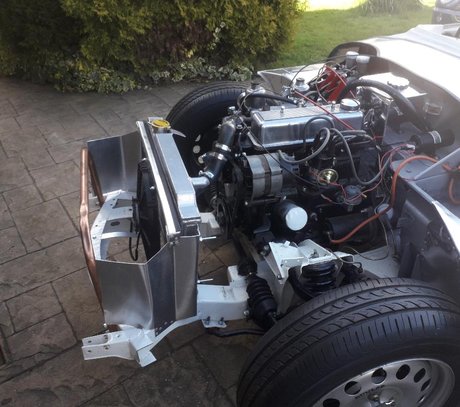
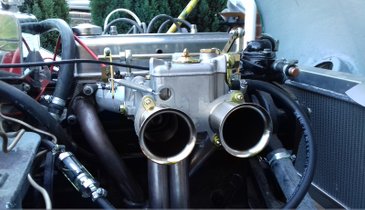
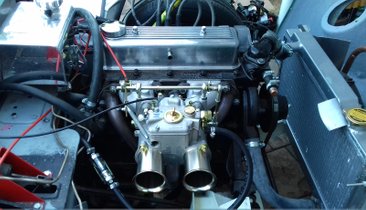
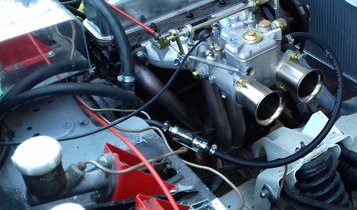
As sure as September runs into October and night meets day, I was always going to give this car a Weber carburettor ( 45 DCOE )
This has significantly changed the look of the engine bay, and ofcourse the sound the engine now makes.
With a quick flip of the accelerator pedal the engine roars and then settles to a gratifying purr.
Carburettor and manifold together with the linkages came as a complete unit, basically bolt on and play ( obviously a little tinkering required )
Weber aquired from: FAST ROAD CARS LTD. Abercarn, Newport, Monmouthshire, NP11 5AE.
Used these guys before to furnash my previous build of a Sebring Sprite with another Weber Carburettor.